top of page

Helping You Age at Home with Confidence -
Nancy Smith, Aging in Place Technology Consultant

Welcome to BC Tech for Seniors!  We're dedicated to assisting both family caregivers and independent seniors who are aging in place. Our blog is a valuable resource for those who are familiar with technology but want to explore more options to support their caregiving journey or enhance their own independence.


What is Aging-in-Place Technology?

Aging-in-place technology supports seniors' independence at home. From smart home devices to telehealth platforms, we've got it covered.


Why Read Our Blog?

Discover New Tools:

Uncover the latest smart home devices, telehealth services, and other senior care technologies that can ease your worries and help seniors live more independently.

Save Time & Effort:

We do the research and provide concise, relevant information on aging-in-place solutions.


Personalized Advice:

Our insights are tailored to family caregivers and seniors, helping you make informed decisions on senior care technology.


Community:

Join a community of like-minded individuals navigating the aging-in-place journey.

Why It Matters

With the senior population set to double by 2050, aging-in-place technology is crucial for meeting long-term care demands. Join us at BC Tech for Seniors to discover how technology can enhance your caregiving experience or support your independent lifestyle!

Explore our blog and stay updated on the best aging-in-place technology to support your caregiving journey or enhance your independent living.

Thanks for subscribing!

What is the Amazon Fire TV Stick?


If you’re looking for a simple way to improve home entertainment, this Fire TV Stick setup for seniors is one of the easiest and most reliable options available.


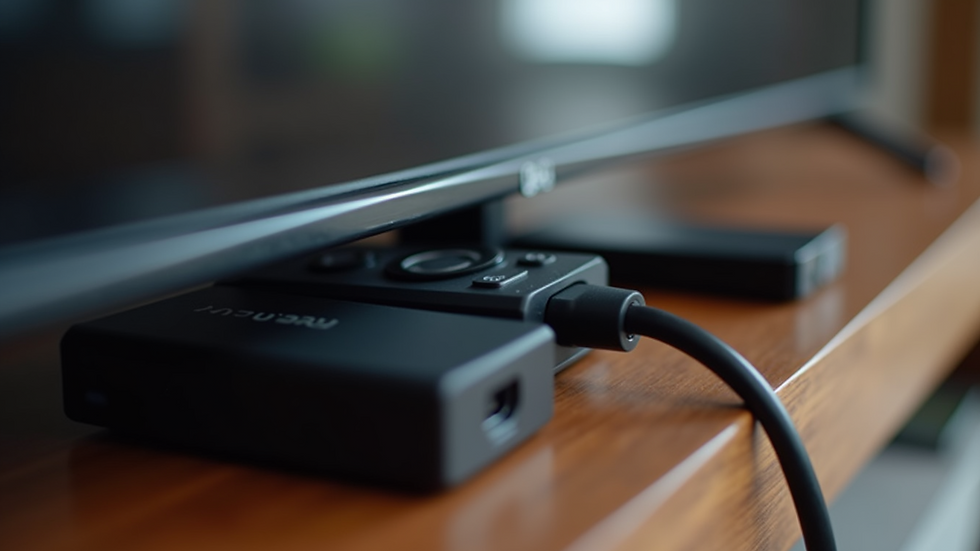
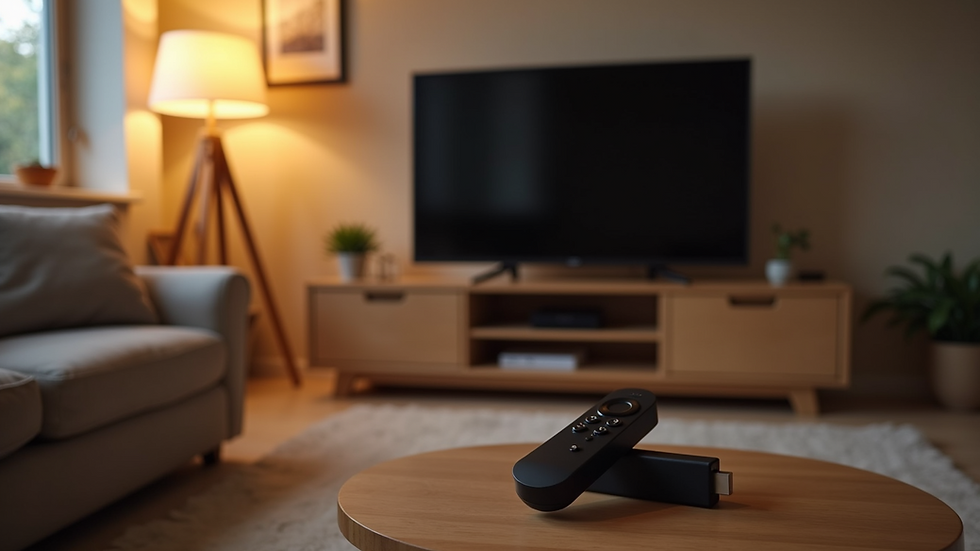
The Amazon Fire TV Stick is a small streaming device made by Amazon. It resembles a memory stick and plugs directly into the HDMI port on the back or side of your television. Once plugged in and connected to your home’s Wi-Fi, it gives your TV access to the internet. This allows you to stream video, music, news, and more using apps that appear on your TV screen. These apps include popular services like Netflix, Amazon Prime Video, YouTube, Disney+, and others.


The Fire TV Stick comes with a handheld remote that includes built-in voice control. You can press a button and say commands like “Play CBC News” or “Open YouTube” instead of typing or searching through menus. The remote communicates with the Fire TV Stick using Bluetooth, which means you do not have to point it directly at the television for it to work.


The Fire TV Stick runs on its own operating system. This means your television does not need to be smart or modern. As long as it has an HDMI port and your home has Wi-Fi, the Fire TV Stick can provide a full smart TV experience. You do not need a cable box, a satellite dish, or a DVD player. The device handles all video streaming directly through the internet.


It also includes a small power cable that must be connected to either a wall plug or a USB port on your TV to keep the device powered. Setup is done by following simple on-screen instructions, and it only needs to be done once. After setup, the Fire TV Stick turns on automatically when you turn on your TV and select the correct HDMI input.


Once installed, the Fire TV Stick becomes the main way to access TV content on that screen. It replaces traditional TV channels with streaming apps. You can add or remove apps based on what you want to watch. Some content is free, while others may require a subscription, such as Netflix or Prime Video.


In summary, the Amazon Fire TV Stick is a compact, plug-in device that turns almost any TV into a smart TV. It connects to the internet, displays streaming apps on your screen, and lets you control everything with a simple remote that includes voice commands.


🎥 Watch: Complete Beginner’s Fire TV Stick Setup (Video)

To see exactly how the Fire TV Stick works, watch this easy step-by-step demo. Perfect for first-time users and caregivers helping loved ones get started.


Step-by-step video tutorial showing how to set up the Amazon Fire TV Stick, including how to plug it in, connect to Wi-Fi, sign in to an Amazon account, and start streaming. Ideal for seniors and caregivers looking for easy-to-follow instructions.

Getting Started: What You’ll Need


📦 Don’t have a Fire TV Stick yet? Click here to order it on Amazon— it’s the same model featured in this guide and usually ships fast.


Before you dive into setup, take a moment to gather everything you’ll need. Setting up the Fire TV Stick is simple, but having these items ready will save you time and frustration.


Essential Items for Setup


Amazon Fire TV Stick

This is the small rectangular device that plugs into your TV. It comes with:

  • A remote control (with voice button if supported)

  • A USB power cable

  • A power adapter

  • Two AAA batteries (usually included for the remote).

Make sure you have everything out of the box and ready to go.


A TV with an HDMI Port

Your TV needs at least one open HDMI port—this is where the Fire TV Stick plugs in. Most flat-screen TVs have these on the back or side. Look for a label like “HDMI 1” or “HDMI 2.” If all ports are full, you may need to unplug another device temporarily.


Reliable Wi-Fi Connection

You’ll need a stable internet connection to stream videos smoothly. A speed of at least 25 Mbps is ideal for watching shows in high definition without buffering.

📶 Not sure how strong your Wi-Fi is? Click here to test your speed. Aim for 25 Mbps or higher for smooth streaming.


Amazon Account

You’ll be asked to sign in with an Amazon account during setup. If you already shop on Amazon, use that same login. If not, you can create a free account during setup. This account allows you to install apps like Netflix, access Amazon Prime Video (if you're a subscriber), and adjust your Fire TV settings.

💡 Did you know? Over 300 million people worldwide already have an Amazon account—so if you’re new to it, you’re not alone!

Step 1: Easy Fire TV Stick Setup for Seniors and First-Time Users


  1. Find the HDMI port on your TV

    Look on the back or side of your television for a port labelled HDMI. Most TVs have more than one. If you see HDMI 1 or HDMI 2, make a note of which one you plan to use.


  2. Insert the Fire TV Stick

    Take the Fire TV Stick and gently plug it into the HDMI port. If the space is tight, you can use the small HDMI extender that came in the box to give you more room.


  3. Connect the power cable

    Plug the small end of the USB cable into the side of the Fire TV Stick. Plug the other end into the included power adapter, and then plug the adapter into a nearby wall outlet. If your TV has a USB port, you can plug it there instead, but using the wall outlet is more reliable.


  4. Turn on your TV and select the correct input

    Use your regular TV remote to turn on the television. Press the Input or Source button and choose the HDMI port you used. For example, if you used HDMI 1, select HDMI 1 from the menu.


  5. Wait for the Fire TV welcome screen

    Once the correct input is selected and the device is powered, the Fire TV logo will appear on your screen. This means everything is connected correctly, and you’re ready for the next step.


Close-up view of the Amazon Fire TV Stick plugged into a TV

Step 2: Connect to Wi-Fi


  1. Insert the included batteries into the remote

    Open the back cover of the Alexa Voice Remote and insert the two AAA batteries that came in the box. The remote should automatically connect to your Fire TV Stick within a few seconds.


  2. Wait for the setup screen to appear

    After turning on your TV and selecting the correct HDMI input, the Fire TV Stick will begin the setup process. A welcome screen will appear, followed by instructions to pair the remote if needed.


  3. Choose your language

    Use the remote to scroll through the list of languages. Highlight your preferred language and press the center button on the remote to select it.


  4. Select your Wi-Fi network

    The Fire TV Stick will begin searching for nearby Wi-Fi networks. When the list appears, use the remote to scroll and find the name of your home Wi-Fi network. If you are not sure which one is yours, check the label on your internet modem or router.


  5. Enter your Wi-Fi password

    Use the on-screen keyboard and the remote to enter your Wi-Fi password. Move around with the navigation ring on the remote and press the center button to select letters. Take your time and make sure everything is entered correctly. Wi-Fi passwords are case-sensitive, so be sure to use capital letters where needed.


  6. Wait for the device to connect

    Once your password is entered, the Fire TV Stick will try to connect to your network. This may take a few moments. If successful, you will see a message confirming the connection. If the connection fails, check that your password is correct and that your internet is working.


Step 3: Sign In to Your Amazon Account


  1. Wait for the sign-in screen to appear

    After your Fire TV Stick connects to Wi-Fi, it will automatically move to the Amazon account sign-in screen. This step is required to activate your device and access apps like Prime Video, Netflix, and YouTube.


  2. Choose how you want to sign in

    You will see two options on the screen:

  3. Sign in using your Amazon account

  4. Create a new account if you do not have one. If you already have an Amazon account (for example, for shopping or using a Kindle), choose the first option. If you have never used Amazon before, select the option to create a new account. The process is simple and free.


  5. Enter your login information

    Use the remote to type in the email address and password connected to your Amazon account. You will see an on-screen keyboard and can scroll across the letters using the navigation ring. Press the center button to select each letter. Be careful when typing. Email addresses are not case-sensitive, but passwords are. Use the shift key on the keyboard to enter capital letters if needed.


  6. Optional: Sign in using your phone or computer

    If you prefer not to type everything on the TV screen, you will see an option that says “Sign in using your phone.” A web address and short code will appear on the screen. You can go to the website on your smartphone, tablet, or computer and enter the code. This will link your Fire TV Stick to your Amazon account automatically.


  7. Wait for confirmation

    Once signed in, your device will be registered to your Amazon account. This allows it to remember your apps, purchases, watch history, and other preferences.


  8. Let the Fire TV Stick check for updates

    After signing in, the Fire TV Stick may check for software updates. If an update is available, it will install automatically. This may take a few minutes. Keep the device plugged in and do not turn off the TV during this step.


Eye-level view of a user entering their Amazon account on the Fire TV Stick

Step 4: Installing Applications


  1. Go to the home screen

    After the device finishes checking for updates, you will see the Fire TV home screen. This is the main menu where you can access all your apps, settings, and features. Use the remote to move left or right along the top menu.


  2. Navigate to the App Store

    Use the remote to highlight the “Find” option on the top menu and press the center button. Then select “Appstore” or “Search.” This is where you can browse or search for specific apps to install on your device.


  3. Search for a specific app

    If you already know the name of the app you want, such as Netflix, YouTube, Prime Video, or Crave, scroll to the search bar and begin typing the name using the on-screen keyboard. You can also hold the microphone button on the remote and say the app name out loud. For example, say “Open YouTube” or “Download Netflix.”


  4. Select the app from the search results

    Once the app appears in the list, highlight it and press the center button on the remote. This will open the app’s download page.


  5. Download the app

    On the app’s page, select the “Get” or “Download” button. The app will begin downloading and installing onto your Fire TV Stick. This usually takes less than a minute if your Wi-Fi connection is strong.


  6. Open the app and sign in

    Once the app has been installed, you will see an “Open” button. Press it to launch the app. If the app requires a subscription, such as Netflix or Prime Video, you will be asked to sign in using your email and password. If the app is free, like YouTube or Tubi, you can start using it right away.


  7. Repeat this process for other apps

    You can go back to the App Store to add more apps the same way. Most people install a mix of subscription-based and free apps. Some popular apps include Netflix, YouTube, Amazon Prime Video, Disney+, Tubi, CBC Gem, and Crave.


Step 5: Navigating the Fire TV Interface


  1. Start from the home screen

    When you turn on your TV and select the correct HDMI input, the Fire TV home screen will appear automatically. This is the main menu where you can access all of your apps, settings, and recently watched content.


  2. Use the remote’s navigation ring

    The round button at the top of your Alexa Voice Remote lets you move up, down, left, and right. Use this ring to scroll through menus. Press the center of the ring to select an item on the screen.


  3. Browse featured content and apps

    The top of the home screen shows recommended shows, movies, and popular apps. Keep scrolling down to find your recently used apps, watchlist, and categories like “Free to Watch,” “TV Shows,” or “News.”


  4. Open the apps row

    Scroll down to the “Your Apps & Channels” section. This is where all the apps you’ve installed will appear. Use the navigation ring to highlight an app, then press the center button to open it.


  5. Access the full apps list

    If you don’t see one of your apps right away, scroll to the end of the row and select “See All.” This opens a complete list of every app currently installed on your Fire TV Stick.


  6. Use voice search for quick access

    You can press and hold the microphone button on your remote and say things like “Open YouTube” or “Search for documentaries.” This is a faster way to open apps or find shows without scrolling through menus.


  7. Adjust settings if needed

    To access settings, move to the gear icon on the far right of the top menu. This section includes options for display, accessibility, parental controls, Wi-Fi, and account information.


  8. Return to the home screen anytime

    Press the home button on your remote (the one with a house icon) to return to the main screen from anywhere.


Step 6: Using Voice Commands with Alexa


  1. Locate the voice button on your remote

    The Alexa Voice Remote includes a small microphone button near the top. This button activates the voice control feature. You do not need to say “Alexa” first. Simply press and hold the microphone button while speaking.


  2. Hold the button while you speak

    Press and hold the microphone button firmly. While holding it down, speak your command clearly into the remote. Release the button when you are done speaking.


  3. Try common commands

    You can use voice commands to search for shows, open apps, or control playback. Here are a few examples:

  4. “Open Netflix”

  5. “Play CBC News”

  6. “Show me comedies”

  7. “Search for nature documentaries”

  8. “Pause”

  9. “Fast forward”

  10. “Go home”


  11. Use voice search instead of typing

    If typing on the screen is difficult or slow, voice commands are a simple alternative. Instead of using the on-screen keyboard, press the microphone button and say what you are looking for. The Fire TV Stick will search and show results on the screen.


  12. Control your TV (if supported)

    If your television supports HDMI-CEC and it is enabled in the settings, you can also use voice commands to control the TV itself. For example, you might say “Turn up the volume” or “Turn off the TV.” Not all TVs support this, so results may vary depending on your television model.


  13. Speak naturally and clearly

    You do not have to use exact phrases. The Fire TV Stick understands simple, everyday language. Speak in a natural tone and keep it short. If it does not recognize your request the first time, try rephrasing.


Helpful Tips for Caregivers


Helping a loved one get comfortable with the Fire TV Stick can make a big difference in their daily routine. Below are helpful tips for caregivers who are setting it up or providing support for a senior at home.


  1. Pre-load apps your loved one already knows

    Install only a few essential apps at first, such as Netflix, YouTube, Prime Video, or CBC Gem. Keep the home screen uncluttered so it feels less overwhelming. You can always add more apps later once they feel confident using the remote.


  2. Organize the apps for easy access

    Move the most-used apps to the front of the “Your Apps & Channels” row. Highlight the app, press the menu button on the remote (three horizontal lines), and select “Move” to place it in a more visible spot.


  3. Adjust the display and font settings

    If your loved one has vision challenges, go to Settings and increase the text size or contrast. Under “Accessibility,” you can also enable features like screen magnifier or text banner for easier reading.


  4. Use voice commands to reduce frustration

    Encourage them to use the Alexa voice button instead of typing. For many seniors, speaking commands like “Play the news” or “Open Netflix” is much easier than navigating menus or using the keyboard.


  5. Enable HDMI-CEC if their TV supports it

    This setting allows the Fire TV remote to control the TV’s power and volume. Go to Fire TV Settings, then Equipment Control, and follow the steps. This simplifies everything into one remote instead of juggling two.


  6. Create a simple printed guide with common commands

    Make a one-page sheet that lists phrases they can use with the Alexa remote, such as “Pause,” “Go home,” or “Search for nature shows.” You can tape this near the TV for easy reference.


  7. Test the Wi-Fi strength in the room

    Use the Fire TV’s built-in network tool to check signal strength under Settings > Network. If the signal is weak, reposition the router or use a Wi-Fi booster to avoid buffering and frustration.


  8. Check in regularly for updates or changes

    Occasionally, check the device to install updates, manage subscriptions, or remove apps they no longer use. Keeping things simple helps build confidence and keeps them in control.


  9. Respect their pace and preferences

    Not every senior will want lots of features right away. Go slow. Start with one app they enjoy, like watching music videos on YouTube or a familiar TV show on Prime. Let their comfort level guide what comes next.


Wrapping Up


Setting up the Amazon Fire TV Stick may feel like a big step at first, but once it’s installed, it quickly becomes part of everyday life. For seniors aging in place, it offers easy access to entertainment, news, music, and connection — all from the comfort of home.


Once the setup is complete, there’s no need to navigate cable menus or worry about complicated remotes. The voice control feature makes it easier to find shows without typing. Apps like YouTube, Netflix, and Prime Video are only a click or voice command away.


If you’re a caregiver, this device can give your loved one more independence while giving you peace of mind. You can simplify their screen, limit distractions, and support their daily routine with programming they enjoy. And if you’re setting it up for yourself, you now have a simple tool that keeps your TV experience clear, calm, and easy to control.


Remember, you don’t need to know everything on day one. Start small. Use the home screen. Try a voice command. Open a favourite app. Once the basics are in place, confidence grows with each click.


If you ever need help, come back to this guide or reach out to a trusted family member or tech support contact. You’ve got this — and your TV just got a whole lot smarter.


🎯 Ready to Try the Fire TV Stick?


If you're ready to get started, you can order the same Fire TV Stick featured in this guide here:👉 Buy the Amazon Fire TV Stick HD on Amazon (affiliate link)

This is the version we recommend for seniors and caregivers who want simple, reliable home entertainment.


Wide angle view of a cozy living room setup with a TV and Fire TV Stick
Wide-angle view of a cozy living room setup with a TV and Fire TV Stick

🛍️ Bonus Tools That Make Setup Easier


While the Fire TV Stick is easy to set up on its own, these optional accessories can make installation smoother, especially in homes with tight TV setups or when helping a loved one. Each tool listed below is practical, affordable, and senior-friendly.

These are the exact tools featured in this guide. All links below use my Amazon Associates code to support my work—thank you for using them!


✅ Amazon Fire TV Stick (HD Model)

This is the same model used throughout this guide. It plugs into your TV’s HDMI port and connects to Wi-Fi so you can stream Netflix, YouTube, Prime Video, and more—all with a simple voice remote.👉 Buy the Fire TV Stick HD on Amazon


✅ HDMI Extender Cable (For Tight Spaces or Wall-Mounted TVs)

If the back of your TV is hard to access or you have limited clearance, this short extender cable gives you room to connect your Fire TV Stick safely. It can also improve Wi-Fi signal by moving the device away from metal surfaces.👉 Buy the HDMI Extender Cable on Amazon


✅ USB Power Adapter (More Reliable Than TV USB Ports)

Many TVs don’t provide enough consistent power through their USB ports. This adapter plugs into the wall and ensures your Fire TV Stick stays powered, preventing startup issues and mid-stream crashes.👉 Buy the USB Power Adapter on Amazon


✅ OTG USB Adapter (For Flash Drives and Storage Expansion)

Want to plug in a USB stick to watch home videos or store more apps? This OTG adapter adds a USB port to your Fire TV Stick while still keeping it powered. Ideal for seniors who want easy access to family photos, music, or offline media.👉 Buy the OTG USB Adapter on Amazon


💡 Tip: All of these accessories are available through Amazon Canada and work perfectly with the Fire TV Stick model featured in this setup guide. Using these exact links ensures you're getting the same trusted products—no guesswork.


🛠️ Bonus: Download the Fire TV Stick Setup Checklist (PDF)


“What if I do this wrong?”

“How will I know it’s working?”

“Where do I even begin?”


These are common questions when setting up the Fire TV Stick, especially when helping someone stay safe and independent at home. That’s exactly why this printable checklist was created.


This free guide helps you:

  • ✅ Follow each step in the right order

  • ✅ Understand why each step matters

  • ✅ Avoid missed connections or confusion

  • ✅ Feel confident during setup, with no guesswork


📄 Click here to download your Fire TV Stick Setup Checklist (PDF)

This checklist will open in a new tab so you can print or save it.


You can print it or save it, and follow along while setting up the device.


📍 Need more tools like this?

📺 Watch our videos: YouTube.com/@bctech4seniors

You love your parent — but their phone is always off, their tablet’s too confusing, and every call feels like a tech tutorial.


Sound familiar? You’re not alone. Families across Canada and the U.S. are struggling to stay connected with older loved ones who have memory loss, cognitive decline, vision problems, or tech frustration. When traditional video calls or smart home devices become too much, many caregivers are left wondering:


“How do I check in without confusing them or stressing myself out?”


That’s where a new tool called OnScreen TV for Seniors is helping families create calm, clear communication — using something every senior already knows: their TV.

📺  What Is OnScreen and How Does It Work?


OnScreen is a caregiving tool that turns any television into a simple, two-way communication device — without any learning curve for your loved one.


The system has two parts:

  1. A small hardware device called the Moment, which plugs into your loved one’s TV.

  2. A caregiver smartphone app called Joy, which lets you control everything remotely.


Here’s how it works:

  • You install the Moment device into the HDMI port of their TV and connect it to Wi-Fi.

  • You then download the Joy app on your phone (iPhone or Android).

  • From the Joy app, you can send your parent:

    • Live video check-ins

    • Photo slideshows

    • Text reminders

    • Pre-recorded video messages


Your parent doesn’t need to do anything. The TV turns on automatically when you send a message. No remotes. No phone calls. No apps for them to use.


This is especially helpful for seniors who:

  • Struggle with phones or tablets

  • Live alone and need visual reassurance

  • Have memory loss or cognitive decline

  • Ignore or forget to respond to calls

  • Feel overwhelmed by menus, buttons, or notifications


✅ You control everything. They simply watch, hear, and feel your presence.


🖥️ Watch how OnScreen turns a regular TV into a caregiver-controlled connection tool — no buttons, no confusion, just calm communication that appears when your loved one needs it most.

📲 Download the caregiver Joy app:

🔒 Everything is encrypted, private, and one-way controlled. More on security below.

🧠 Why OnScreen TV for Seniors Works So Well for Memory Loss and Aging in Place


Dementia and Alzheimer’s don’t just affect memory — they change how a person interacts with technology, people, and even routine communication. What used to be a simple phone call can now trigger confusion or distress.


For many caregivers, this leads to daily struggles like:

  • Missed calls and unreturned texts

  • Frustrating attempts to explain how to “unlock the screen”

  • Lost tablets or uncharged phones

  • Constant worry about whether they’re okay


OnScreen removes the struggle by meeting your parent where they are — using the one screen they still understand: the TV.


An elderly woman joyfully engages in a video call with a loved one, seated comfortably in her cozy living room.

Here’s why it works:

  • Familiar Environment: The TV isn’t intimidating. There’s no menu or log-in. It just turns on.

  • No Input Needed: Your loved one doesn’t need to answer or click anything.

  • Visual Comfort: Seeing your face reduces anxiety, even during memory confusion.

  • Routine Friendly: You can send reminders at the same time every day, creating structure and emotional calm.


🧓 This tool is especially effective in mid-to-late stages of memory loss and for caregivers who feel overwhelmed trying to manage tech for someone who can no longer keep up.

👁️ What If My Parent Has Vision or Hearing Loss?


One of the most overlooked struggles in tech for seniors is sensory decline. Smartphones are hard to see. Tablets are hard to hear. Voice assistants require shouting and accurate phrasing.

That’s why OnScreen was built with accessibility in mind — especially for older adults with low vision, hearing challenges, or mobility limitations.


🔍 Vision Support

  • The Moment device displays large fonts and high contrast colors.

  • Only one thing appears on screen at a time — no scrolling, no menu.

  • You can choose white text on a dark background for maximum readability.

  • All visual messages are simple and distraction-free.

Even those with macular degeneration or cataracts can usually read OnScreen messages more clearly than smartphone screens.


🔊 Hearing Support

  • OnScreen doesn’t rely on sound-based alerts or ringing tones.

  • You can send photo slideshows, text prompts, or video clips with captions.

  • Lip reading is supported through video messages.

  • There’s no need for back-and-forth conversation unless you choose to do a video check-in.


This makes it far more effective than a voice assistant or phone — especially for seniors who don’t want to repeat themselves or guess at commands.


🧍 Mobility-Friendly

  • Because the TV turns on automatically, there’s no need to get up or push buttons.

  • Messages appear whether they’re in a chair, bed, or on the couch.

  • You can send reminders like “Time to drink water” or “Stretch your legs” — and it plays on-screen instantly.


🛠️ Step-by-Step: How to Set Up OnScreen Without Confusion


You don’t need to be “tech-savvy” to make this work. Setting up OnScreen takes just a few minutes, and once it’s done, your loved one never has to touch it again.

Here’s what setup looks like:


✅ What You Need:

  • A TV with an HDMI port

  • A power outlet nearby

  • Wi-Fi at your loved one’s home

  • Your smartphone with the Joy app installed (iPhone or Android)


🔌 1. Plug It In

Take the Moment device out of the box and plug it into your loved one’s TV using the HDMI cable provided. Connect the power cord and turn on the TV.


📶 2. Connect to Wi-Fi

Using your phone or tablet, follow the on-screen pairing instructions. You’ll choose the Wi-Fi network and enter the password just once.


📱 3. Install the Joy App

On your phone, install the free Joy for Caregivers app:

  • iPhone (App Store)

  • Android (Google Play)

Then create your account and link it to your loved one’s Moment device. This allows you to control everything — they don’t have to lift a finger.


💬 4. Start Connecting

From the app, you can now:

  • Start a video check-in that appears directly on their TV

  • Send reminders like “Time to take your meds”

  • Show photos, calming notes, or even bedtime messages

No buttons. No logins. No tech headaches.


🎥 Visual Walkthrough – Watch It Happen

Want to see exactly how it works? This short video from OnScreen walks you through every step:

It shows how caregivers install the Moment device, connect to Wi-Fi, pair with the Joy app, and begin check-ins — all in under 3 minutes.


🔐 Privacy and Security Are Taken Very Seriously:


From app to hardware, OnScreen is designed for caregiver-controlled privacy:


  • The Joy app on your phone securely transmits video, messages, and commands to the Moment device — no data is shared with third parties.


  • The hardware incorporates:

    • A physical camera shutter to block the lens

    • A manual microphone mute switch (mic disabled when red indicator is visible) 


  • All communication between the Joy app and Moment device is encrypted in transit, matching HIPAA-aligned technical safeguards for data protection. While OnScreen is not a healthcare provider, it follows industry-standard encryption rules for private elder care communication. 


✔️ What This Means for You:

  • You never need technical experience — the app guides you, and OnScreen support can do a setup call if needed. 


  • Your loved one doesn’t have to touch anything — once paired, you initiate every interaction.


The system respects privacy by preventing unauthorized access, disabling audio when needed, and avoiding third-party integration.


Simple Setup in Minutes

  • Open the OnScreen box — find Moment, HDMI cable, power adapter, and activation instructions including Order ID/QR code.

  • Mount or place the Moment device on or near the TV.

  • Connect HDMI and power; switch TV to that input.

  • Scan the QR code using the Joy caregiver app and enter Wi‑Fi credentials one time.

  • Allow the device to install updates and test with a live “Hello” video message.


Privacy Built In

  • Physical camera cover and microphone mute switch

  • All communication encrypted and caregiver-controlled

  • No third-party data access

  • Solves worries about sensitive information being recorded or shared

💰 What Does It Cost? (Verified for U.S. & Canada)

OnScreen is priced as a hardware + service model. Here’s exactly what you’re paying — and why it’s worth it:


Item

USD

CAD (approx.)

Moment Device (one-time)

$149 USD

~$199 CAD

Monthly Subscription

$29.99 USD

~$41 CAD/month

Free Trial

30 days free

30 days free


✅ What You’ll Need at Your Parent’s Home:

  • A TV with an HDMI port

  • Wi-Fi

  • A nearby power outlet

There are no hidden fees — and you can pause or cancel anytime after your free trial.


💸 “That’s $41 a Month — Why Would I Pay That?”


It’s a fair question — and one every caregiver thinks about. Here’s the truth:


  • 🛻 One roundtrip across town to check in? Easily $20–30 in gas and time.

  • 🕐 Lost hours from work, missed calls, and endless tech support? That costs you far more than $1/day.

  • 📵 Tablets break. Passwords reset. Phones go unanswered. And you’re left worried again.

For $1.30 CAD per day, you get:


✔️ Reliable visual check-ins

✔️ A system that runs without your parent lifting a finger

✔️ Confidence that you’ll see they’re okay — even if they can’t call you


This isn’t a luxury. It’s a lifeline.

It’s not just about what you’re buying — it’s about what you’re avoiding:

  • The panic of silence.

  • The guilt of missing a call.

  • The fear of being too late.


OnScreen offers calm. Simplicity. Daily connection — without confusion.

How Canadians Can Order OnScreen


If you're in Canada, you may have noticed that OnScreen doesn’t ship directly across the border. But there’s a simple solution — and it comes straight from OnScreen’s official website.


What OnScreen Says


On the OnScreen Pricing & Billing FAQ, they answer this clearly:

Do you ship to Canada?“We do not, but you can work with our Canadian reseller, WiseBridge Solutions.”

This means Canadian families still have access — you just go through their approved partner.


🛒 How to Get OnScreen in Canada — Step-by-Step


1. Visit WiseBridge Solutions Go to www.wisebridgesolutions.com. This is OnScreen’s official Canadian distributor.


2. Contact WiseBridge Directly There’s no online store. You’ll need to call or email them using the contact info here: wisebridgesolutions.com/contact


3. Ask These Key Questions:

  • Do you ship to my province?

  • What is the full cost in Canadian dollars (device + monthly)?

  • Is setup or activation included?

  • How long will delivery take?

  • What’s your return or cancellation policy?


4. Know the Base Pricing (as of July 2025):

  • Moment device: $149 USD (approx. $199 CAD)

  • Monthly subscription: $29.99 USD (approx. $41 CAD)

WiseBridge may offer bundled pricing, flat-rate quotes, or even tech support to help you get started.


5. Confirm Canadian Support Options Ask if they provide:

  • Remote installation help

  • Printed setup instructions

  • Canadian-based support or return services


💬 Why This Matters for Canadian Caregivers


OnScreen is an ideal solution for aging-in-place support — but most U.S.-based tech doesn’t make it easy for Canadians. With WiseBridge, you avoid:

✔️ Complicated international shipping

✔️ Currency exchange surprises

✔️ Lack of support when something goes wrong


Instead, you get:

  • Local access to U.S. technology

  • The same benefits American families are using

  • A trusted reseller who understands Canadian needs

❓ Real Questions Families Ask

These are the exact concerns families have before trying OnScreen — and every answer is based on how the system actually works:


“Do I have to teach my parent how to use it?”

No. Your parent doesn’t have to press a single button. When you send a message, the TV turns on automatically and shows it. They don’t need to remember anything or navigate any menus.


“What if they already forget how to turn on the TV?”

That’s exactly why OnScreen was created. The Moment device uses HDMI‑CEC technology to automatically power on the TV and switch to the correct input — no remote needed.


“Can multiple people use it?”

Yes, Multiple family members can download the Joy caregiver app, link to the same device, and send messages or check in. Everyone stays connected — even if you live in different cities.


“Can I send reminders like ‘Take your meds’ or ‘Time for water’?”

Absolutely.

You can send:

  • Text-based notes (like “Hi Dad — time to take your pills”)

  • Voice messages

  • Photo reminders; These appear full-screen on the TV at the time you choose.


“What if my parent is nearly blind or hard of hearing?”

OnScreen was built with sensory challenges in mind.

  • Vision: High-contrast, large-font screens — one message at a time.

  • Hearing: No sound is required. Visual messages can include photos or captions.

  • Mobility: Since the TV powers on automatically, your parent never needs to touch anything.


Even in homes where someone has dementia, Alzheimer’s, or stroke-related limitations, OnScreen delivers connection without confusion.

✅ Trusted by Experts in Aging Tech

OnScreen isn’t just another smart device — it’s been recognized by leading aging and caregiving organizations for its simplicity, effectiveness, and design.


🏆 AARP AgeTech Winner – CES 2024

OnScreen won the AARP AgeTech After Dark pitch challenge at CES 2024 and received a $10,000 innovation prize. Judges praised its intuitive, no-buttons-needed design and caregiver-first approach.🔗 Read the award announcement on AgeInPlaceTech


🚀 Part of AARP’s AgeTech Collaborative™ Accelerator

In 2024, OnScreen was selected by AARP to join the AgeTech Collaborative™ startup incubator, which supports companies helping older adults stay independent.🔗 Read the press release from OnScreen


📰 Reviewed by Experts in Aging

  • Customized Aging called it “easy, age-friendly tech” that supports wellness, reminders, and calls through the TV.🔗 Read the review

  • GearBrain praised its TV-based design, caregiver app, and simple setup.🔗 Read GearBrain’s review


🗣️ What Experts Say

Longevity and AgeTech experts like Laurie Orlov and Mary Furlong have highlighted OnScreen for helping reduce senior isolation and simplify tech use — especially for those aging in place.


✨ Why This Matters

Caregivers want solutions they can trust — especially when money, safety, and loved ones are involved. This level of third-party validation means:

  • It’s not just a new idea — it’s been tested and reviewed

  • It solves real-world problems caregivers face daily

  • It’s respected by experts who work in dementia care, aging-in-place, and caregiver support


Still not sure if OnScreen is the right fit for your family?

This free, printable checklist walks you through the questions caregivers ask every day — so you can make a confident decision.

Ask yourself:

  • Can my parent follow simple routines without reminders?

  • Do they get anxious or confused by modern devices?

  • Would seeing my face help calm them down?

  • Are they forgetting how to answer the phone or check messages?

  • Am I constantly driving over or calling multiple times a day?

  • Is this level of worry affecting my own health or schedule?


If you said “yes” to even one, OnScreen might be exactly what you need.


📝 This checklist is easy to print or share with your family — and helps take the pressure off your next decision.

❤️ Final Thought


If you're drained from driving across town just to check in…If you're constantly troubleshooting devices or wondering if they’re okay…You're not alone — and you don’t have to keep doing it this way.


This isn't just a tech tool. It's a quiet solution to a loud problem.


It keeps connection simple. It reduces stress. And it supports your parent without requiring them to learn anything new.

You're not trying to control their life — you're trying to stay close without overwhelming them or losing yourself.

Let the screen show your care.

Let the routine bring comfort.

Let yourself exhale.

As more seniors choose to remain in the comfort of their own homes, aging in place has become increasingly popular. Staying in familiar surroundings brings peace of mind. However, it also comes with significant challenges, particularly when managing everyday tasks during extreme weather, like hot summer nights.


Fortunately, smart home technology has advanced significantly. Devices like Amazon Alexa provide easy-to-use, voice-activated support that helps seniors stay comfortable, safe, and in control. This allows them to maintain their independence without needing to move around or rely heavily on others.


The Impact of Smart Assistants on Quality of Life


Smart assistants, such as Alexa, are designed for convenience. For older adults, these devices can notably enhance their quality of life. For seniors who face mobility issues, voice commands make all the difference. Instead of struggling to reach a light switch or thermostat, they can simply speak to Alexa to accomplish the same tasks.


For example, a senior suffering from arthritis or other medical conditions can easily say, “Alexa, turn off the lights,” or “Alexa, play calming music,” without needing to leave their bed. Recent data shows that over 40% of seniors face some form of mobility issue. Reducing the need to get up can decrease both discomfort and the risk of injury.


Alexa promotes ease in managing everyday tasks. Whether it’s turning on a fan, adjusting lighting, or checking the time, seniors can do it all by voice. This level of support helps them maintain routines with fewer interruptions, giving them more control over their environment.


Turning on the Air Conditioning with Alexa


Comfort is often hard to find during hot summer nights—especially for seniors who may struggle to get out of bed to adjust the thermostat. With Alexa, that issue is easily resolved. A senior can simply say, “Alexa, turn on the air conditioner,” and within seconds, the room begins to cool. This voice-controlled climate management offers real relief, particularly for those sensitive to heat.


Staying cool is crucial; it’s not just about comfort but also health. Older adults are at higher risk for heat-related illnesses, which can lead to serious complications. The ability to manage air conditioning without moving can significantly reduce this risk.


Moreover, Alexa works seamlessly with smart thermostats to automatically adjust temperatures based on the time of day or personal preferences. This ensures consistent comfort—whether it's late at night or early in the morning.


Eye-level view of air conditioning unit in a cozy room
An air conditioning unit set to cool a room during summer.

Voice-Controlled Lighting and Its Safety Benefits


Lighting plays a vital role in comfort and safety. Seniors often wake up during the night or move around in the early hours. Navigating in the dark increases the risk of falls, a leading cause of injury among older adults.


Alexa addresses this concern with simple voice-activated lighting control. Instead of fumbling for a switch, a senior can say, “Alexa, turn on the hallway light,” or “Alexa, dim the bedroom lights.” The response is instant and effortless. If a light was accidentally left on in another room, it can be turned off without needing to get up.


Smart lighting systems also allow for scheduling. Lights can turn on or off at specific times. This feature is particularly beneficial for those with vision impairments or memory challenges. It reduces the risk of tripping or waking up confused in the dark.


Scheduling Routines for Better Daily Management


Establishing a predictable daily routine helps older adults feel secure and minimizes confusion, especially for those experiencing mild cognitive decline. Alexa can create customized routines to meet their needs. For instance, saying “Alexa, goodnight” can trigger a series of automated actions—like turning off lights, lowering the thermostat, and playing soothing sounds.


These routines eliminate the need for manual adjustments, which can be especially helpful for seniors who experience fatigue or forgetfulness. Everything operates according to a set schedule, making life smoother and less stressful.


A popular morning routine might include a gentle wake-up call. At a specific time, Alexa can gradually turn on lights, provide a weather update, list that day’s appointments, and even suggest a light stretching routine. Voice-activated automation contributes to structure and improves daily flow.


Ensuring Safety with Voice Commands


Safety is paramount for seniors living independently. Alexa can support them in emergencies by calling designated family members, friends, or emergency services with a simple voice command. For example, saying “Alexa, call my son” can instantly connect them to assistance without needing to dial a number.


Alexa can also offer reminders for important health-related tasks. It can announce, “It’s time to take your medication,” or “Your doctor’s appointment is in one hour.” These prompts help prevent missed doses or appointments, common concerns among seniors managing multiple prescriptions.


Voice-activated alerts can be set up for home security. This includes motion detectors, door sensors, and alarms. With Alexa, seniors can quickly check if the front door is locked or if the porch light is on—just by asking.


Close-up of Alexa device on a bedside table
An Alexa device placed on a bedside table ready for voice commands.

Connecting to Other Smart Devices for a Comprehensive Solution


Alexa functions as more than just a standalone assistant; it serves as a control center for other smart home devices. When integrated with items like smart plugs, smart thermostats, fans, and even door locks, Alexa becomes a powerful tool for managing the home environment through voice alone.


A senior lying in bed can say, “Alexa, turn on the fan,” or “Alexa, lock the front door,” and see it happen instantly. Eliminating the need to get up or search for a remote reduces effort and promotes a safer, more relaxing home environment.


Smart plugs offer another useful feature, allowing seniors to control coffee makers, lamps, and electric blankets with their voice. Everything connects to one system, eliminating confusion from multiple remotes or devices.


Overcoming the Learning Curve


At first, using a smart assistant may appear complex—especially for those who aren't accustomed to newer technologies. However, Alexa is designed to be user-friendly. Most devices are ready for use with simple setup instructions, and ample support options exist, including video tutorials and phone assistance.


Family members can play a valuable role during setup. They can show seniors how to operate Alexa, set up key features, and create routines. Over time, many older users find that Alexa becomes part of their daily habits.


Allowing time for learning and practice is essential. With patience and guidance, seniors often gain confidence in using Alexa for daily tasks. Surveys indicate that over 70% of seniors who adopted voice-activated technology reported improvements in convenience and overall satisfaction with their living environment.


Final Thoughts


Smart home devices like Amazon Alexa are revolutionizing how older adults live at home. For seniors aging in place, Alexa provides an efficient way to manage daily tasks, control climate, adjust lighting, stay on schedule, and enhance safety—all without needing to leave their beds.


Using simple voice commands, seniors can adjust the thermostat, play music, or turn off the lights—all while remaining comfortably in place. These tools are not just practical; they are designed to support the unique needs of older adults, allowing them to live with fewer disruptions and more ease.


Smart assistants make everyday life simpler, safer, and more manageable, right from the comfort of home.


Ready to Simplify Your Life with Alexa?


To learn how to set up Alexa routines and connect smart devices, visit Amazon’s official guide: amazon.com/alexa-routines. This easy-to-follow page shows you how to automate tasks and control your home using voice commands. Need help? Ask a family member or caregiver for assistance during setup.


Start using Alexa today to create a safer, more comfortable home environment.

  • Youtube
  • Instagram
  • Facebook

©2026 by BC Tech For Seniors

bottom of page